Step By Step
1、TensorFlow模型訓練Code Sample
from tensorflow.examples.tutorials.mnist import input_data
mnist = input_data.read_data_sets("MNIST_data/", one_hot = True)
import tensorflow as tf

if __name__ == '__main__':
    x = tf.placeholder(tf.float32, [None,784], name="x")
    W = tf.Variable(tf.zeros([784,10]))
    b = tf.Variable(tf.zeros([10]))
    y = tf.nn.softmax(tf.matmul(x,W) + b, name="y")
    y_ = tf.placeholder(tf.float32, [None, 10])
    cross_entropy = tf.reduce_mean(-tf.reduce_sum(y_ * tf.log(y), reduction_indices=[1]))
    train_step = tf.train.GradientDescentOptimizer(0.5).minimize(cross_entropy)
    init = tf.initialize_all_variables()
    sess = tf.Session()
    sess.run(init)

    for i in range(1000):
        batch_xs, batch_ys = mnist.train.next_batch(100)
        sess.run(train_step, feed_dict={x: batch_xs, y_: batch_ys})
    correct_prediction = tf.equal(tf.argmax(y,1), tf.argmax(y_,1))
    accuracy = tf.reduce_mean(tf.cast(correct_prediction, tf.float32))
    print(sess.run(accuracy, feed_dict = {x: mnist.test.images, y_:mnist.test.labels}))
    saver = tf.train.Saver()
    tf.saved_model.simple_save(
        sess,
        "./savedmodel/",
        inputs={"image": x},   ## x是模型的輸入變量
        outputs={"scores": y}  ## y是模型的輸出
    )
注意:目前僅支持TensorFlow1.12和TensorFlow1.14,所以在訓練模型的時候注意選擇對應版本的TensorFlow。
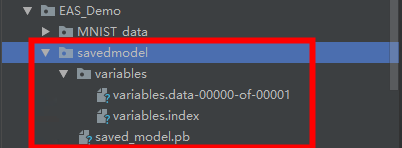
2、模型導出保存打包

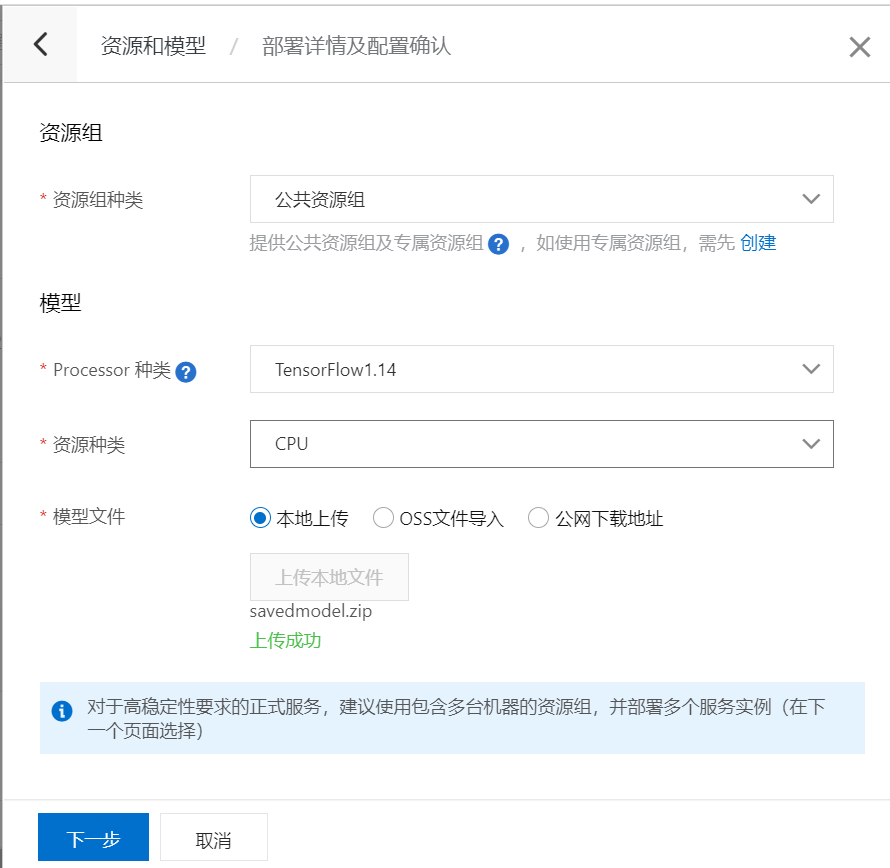
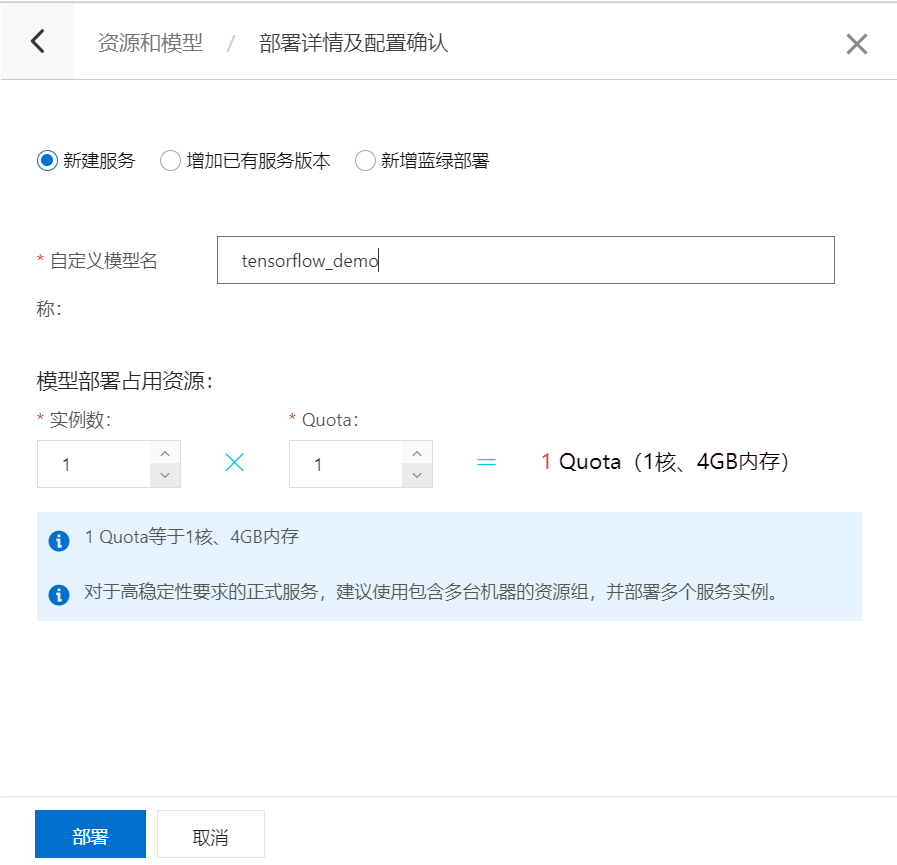
3、EAS控制檯導入模型


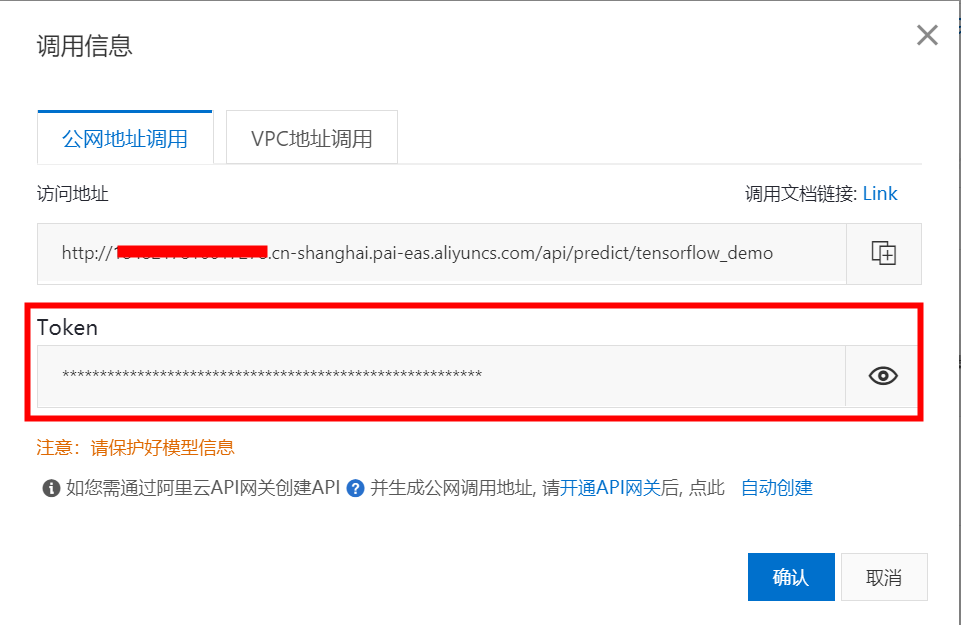
4、獲取模型信息
curl http://18482178.cn-shanghai.pai-eas.aliyuncs.com/api/predict/* -H 'Authorization:' | python -mjson.tool

5、Python SDK調用
eas-prediction 包安裝
測試:28*28=784規格圖片下載地址

Code Sample
#!/usr/bin/env python
from eas_prediction import PredictClient, TFRequest

import cv2
import numpy as np

with open('2.jpg', 'rb') as infile:
    buf = infile.read()
    # 使用numpy將字節流轉換成array
    x = np.fromstring(buf, dtype='uint8')
    # 將讀取到的array進行圖片解碼獲得28 × 28的矩陣
    img = cv2.imdecode(x, cv2.IMREAD_UNCHANGED)
    # 由於預測服務API需要長度為784的一維向量將矩陣reshape成784
    img = np.reshape(img, 784)

if __name__ == '__main__':

    # http://1848217816******.cn-shanghai.pai-eas.aliyuncs.com/api/predict/tarotensor
    client = PredictClient('1848******.cn-shanghai.pai-eas.aliyuncs.com', 'tarotensor')
    #  注意上面的client = PredictClient()內填入的信息,是通過對調用信息窗口(下圖)中獲取的訪問地址的拆分
    client.set_token('NjlmZDFjYzR*******')
    #  Token信息在“EAS控制檯—服務列表—服務—調用信息—公網地址調用—Token”中獲取
    client.init()

    req = TFRequest('serving_default') # signature_name 參數
    req.add_feed('image', [1, 784], TFRequest.DT_FLOAT, img)

    resp = client.predict(req)
    print(resp)
Result
outputs {
  key: "scores"
  value {
    dtype: DT_FLOAT
    array_shape {
      dim: 1
      dim: 10
    }
    float_val: 0.0
    float_val: 0.0
    float_val: 1.0
    float_val: 0.0
    float_val: 0.0
    float_val: 0.0
    float_val: 0.0
    float_val: 0.0
    float_val: 0.0
    float_val: 0.0
  }
}