IDEA作為我們(後端Java開發者)必不可少的IDE,以其智能的代碼提示、多樣的框架支持、簡潔的開發界面等特性,被業界公認為最好的Java開發工具之一。而一款IDE是否強大,最簡單的衡量標準就是查看其插件生態環境的發展情況,多種多樣的插件既豐富了IDE自身的功能,同時大大提高了開發人員的工作效率。
一 概念簡介
插件類型
IDEA的插件根據功能分為以下4種類型:
- 自定義語言支持,例如Go語言插件。這種插件包括文件類型識別、格式化、語言保留字支持、編譯、運行等語言開發必備功能。屬於比較重量級的插件。
- 開發框架支持,例如Spring框架插件。這種插件包括框架特殊代碼識別、框架功能支持等。不同開發框架開發量、難度不同。
- 工具集成,例如我司內容的雲雀,就是這種插件,也是最常用的插件,後續的開發實例也屬於這種類型。這種插件一般包括額外的功能、功能相關的UI以及訪問外部資源。
- UI附加,主要限於UI的修改。
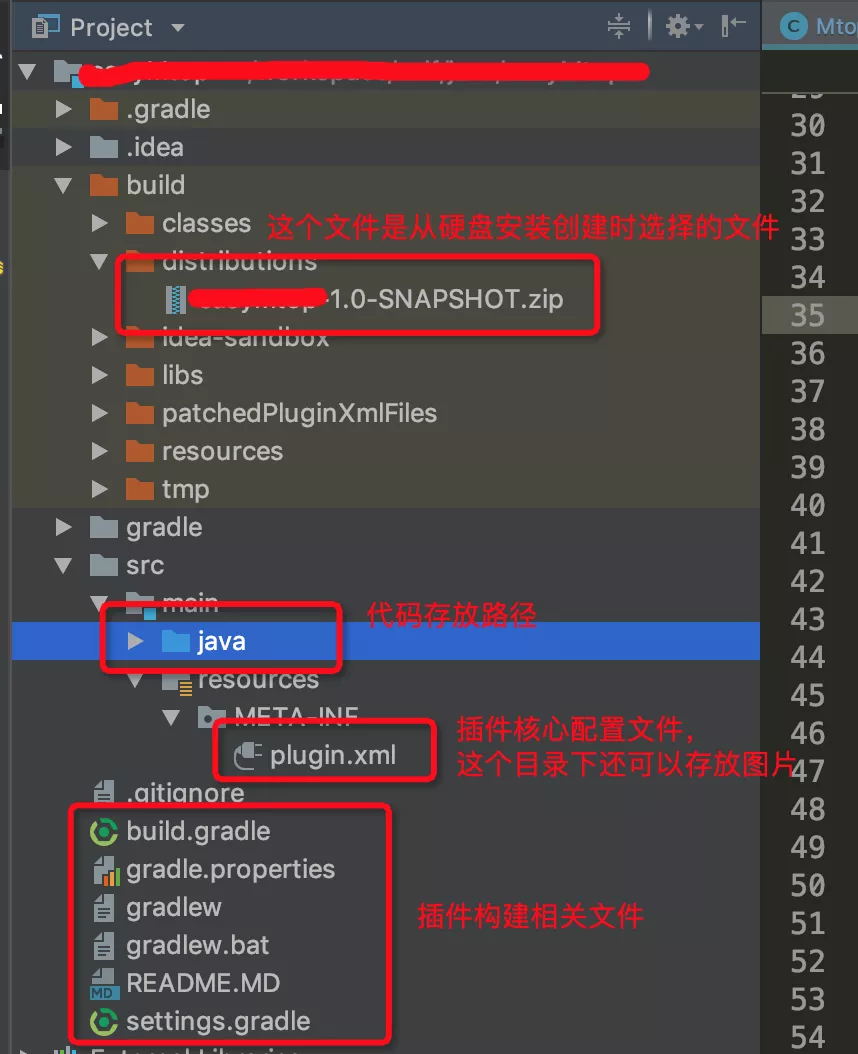
開發目錄結構

組成部分
- 配置文件,配置文件就是插件對IDE的自我介紹,IDEA中是META-INF/plugin.xml,詳細的配置信息請參見官方文檔。
- ClassLoader,每個插件對應一個ClassLoader,彼此之間隔離(類似於Pandora的插件機制)。
- Component(組件),插件內部可以有三個級別的組件:Applciation、Project、Module,分別需要在plugin.xml文件配置,並實現不同的接口。
- 擴展和擴展點(Extesions and Extension Points),擴展用於擴展IDEA自身或者其他組件擴展點的功能,例如添加一個自定義的JavaDoc中的Tag。擴展點是插件提供給其他插件使用的。
- 動作(Action),動作在配置文件中配置,由某個菜單項觸發。
- 圖標(Icon),插件使用到的圖標。
- 服務(Service),用於後端運行的某些服務實現。
- 依賴(Dependencies),插件可能依賴的其他插件、三方包等。
二 開發過程簡述
此部分以一個簡單插件開發實例進行說明。
1 創建項目
IDEA插件項目開發時,有兩種創建方式,一種是IntelliJ Platform Plugin,另一種是Gradle下的IntelliJ Platform Plugin(在Gradle插件安裝的情況下)。推薦使用第二種方式,使用Gradle的方式可以方便的添加第三方依賴庫,同時也是官方推薦的方式。
選擇好創建方式後,根據需要填寫信息即可完成創建。
2 設置創建入口
由於實例插件是一個工具集成類型的插件,我們需要在IDEA的UI添加插件的入口,這部分在配置文件plugin.xml中添加如下內容:
<actions>
    <!-- Add your actions here -->
    <group id="分組id" text="顯示文本1" description="鼠標駐留時的顯示">
        <add-to-group group-id="MainMenu(這個id指的是IDEA的頂部菜單)" anchor="位置(last等)"/>
        <action class="動作類全路徑" id="動作類id" text="顯示文本2" description="鼠標駐留時的顯示"/>
    </group>
</actions>
我們可以發現,入口就是一個Action。需要申明Action的位置和處理類。以上聲明的UI效果:

3 編寫處理邏輯
在配置文件中指明的動作處理類中添加處理邏輯。具體邏輯根據實際需要。
三 使用總結
1 彈出對話框
使用:
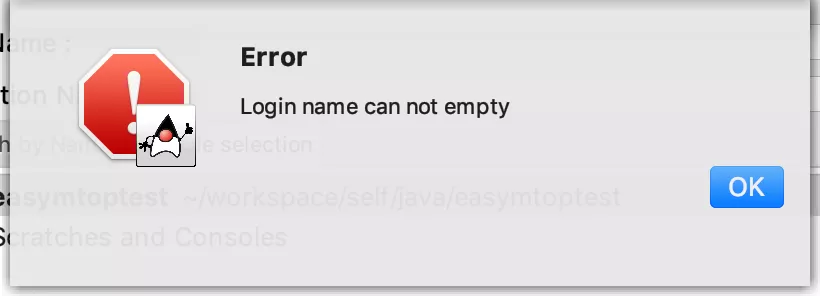
Messages.showErrorDialog(myTabbedPane.getComponent()," 彈出文本內容");

2 提示信息
使用 new Notification(groupId 自定義, 標題, 內容, 類型(info、warning、error)).notify(項目對象實例);

3 擴展點使用
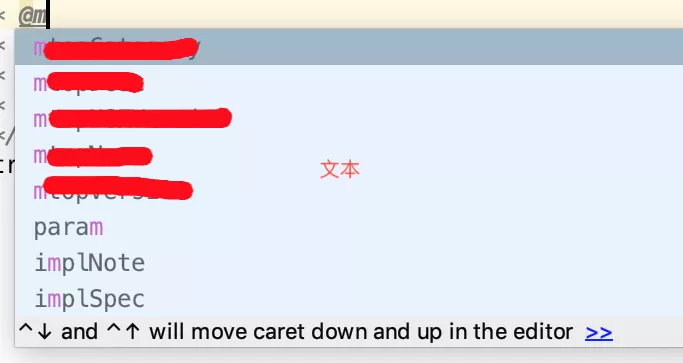
在配置文件中,添加擴展點配置,其他擴展點類型:
<extensions defaultExtensionNs="com.intellij">
    <!-- 添加自定義擴展標籤,這裡的customJavadocTagProvider是IDEA自身申明的 -->
    <customJavadocTagProvider implementation="擴展點實現類"/>
</extensions>
自定義JavaDoc的擴展效果:

4 自定義LiveTemplate
(1)在plugin.xml中配置liveTemplate擴展點的相關實現:
<!-- 自定義LiveTemplate -->
<defaultLiveTemplatesProvider
    implementation="DefaultLiveTemplatesProvider接口的實現類"/>
<!-- 自定義LiveTemplate上下文,以及上下文可以使用的配置 -->
<liveTemplateContext
    implementation="TemplateContextType類的子類"/>
(2)在 DefaultLiveTemplatesProvider 接口的實現類的 getDefaultLiveTemplateFiles 方法中註冊LiveTemplate定義文件:
@Override
public String[] getDefaultLiveTemplateFiles() {
    //文件名不需要有後綴,例如a.xml,這裡只需要輸入a
    return new String[]{"liveTemplates/文件1", "liveTemplates/文件2"};
}
(3)在 TemplateContextType 類的子類的構造方法中定義上下文名稱,以及 isInContext 方法中定義上下文可以使用的位置。例如:
public XXXJavaInlineCommentContextType() {
    super("上下文id", "名稱", 上下文基礎類型);
}

@Override
public boolean isInContext(@NotNull final PsiFile file, final int offset) {
    if (PsiUtilCore.getLanguageAtOffset(file, offset).isKindOf(JavaLanguage.INSTANCE)) {
        PsiElement element = file.findElementAt(offset);
        if (element instanceof PsiWhiteSpace && offset > 0) {
            element = file.findElementAt(offset-1);
        }
        if (null == element) {
            return false;
        }
        return (element.getParent() instanceof PsiInlineDocTag && element.getParent().getParent() instanceof PsiDocTag)
            || (element.getParent() instanceof PsiInlineDocTag && PsiTreeUtil.getParentOfType(element, PsiField.class, false) != null);
    }
    return false;
}
(4)編寫LiveTemplate定義xml文件,例如:
<templateSet group="分組名">
<template name="模板名" value="模板值,可以使用$VAR1$來指代變量位置" description="描述信息" toReformat="false" toShortenFQNames="true">
    <variable name="變量名" expression="" defaultValue="" alwaysStopAt="true" />
    <context>
        <option name="自定義的或者預定義的template上下文id" value="true" />
    </context>
</template>
</templateSet>
5 插件中調用Dubbo
(1)在Gradle的構建文件build.gradle中的dependencies內添加如下配置:
compile 'org.apache.dubbo:dubbo:2.7.7'
 compile 'org.apache.dubbo:dubbo-dependencies-zookeeper:2.7.7'
(2)在接口調用處進行如下編碼:
//將當前線程的classloader備份,並設置當前線程的classloader為當前類的classloader
//當前線程的classloader是IDEA的,當前類的classloader是當前插件的
//不進行如此設置會造成Dubbo擴展點實現無法在ClassLoader中找到
ClassLoader backCl = Thread.currentThread().getContextClassLoader();
Thread.currentThread().setContextClassLoader(this.getClass().getClassLoader());
// 以下內容參考Dubbo的泛化調用
// 當前應用配置
ApplicationConfig application = new ApplicationConfig();
application.setName("應用名");

// 連接註冊中心配置
RegistryConfig registry = new RegistryConfig();
registry.setAddress("zookeeper://127.0.0.1:2181");

// 引用遠程服務
ReferenceConfig<GenericService> reference = new ReferenceConfig<GenericService>(); // 此實例很重,封裝了與註冊中心的連接以及與提供者的連接,請自行緩存,否則可能造成內存和連接洩漏
reference.setApplication(application);
reference.setRegistry(registry); // 多個註冊中心可以用setRegistries()
reference.setInterface("服務全類名");
reference.setVersion("服務版本號");
reference.setGeneric(true);

// 和本地bean一樣使用xxxService
GenericService genericService = reference.get();
//泛化調用
Object result = genericService.$invoke("方法名", new String[]{"參數類型"}, new Object[]{"參數值"});
System.out.println(result);
//恢復classloader設置
Thread.currentThread().setContextClassLoader(backCl);
6 發佈插件的指定IDEA倉庫
(1)在build.gradle文件中進行如下配置
publishPlugin {
    host = 'https://xxxx.com'  //倉庫地址
    username 'onepublish' //倉庫指定用戶名
    password 'onepublish' //倉庫密碼
    token 'onepublish'  //倉庫驗證token
}
(2)執行gradle中publishPlugin任務。
7 發佈到指定IDEA插件失敗
當我們開發完成後,通過publishPlugin任務發佈時,可能會出現以下報錯信息:
The resource identified by this request is only capable of generating responses with characteristics not acceptable according to the request "accept" headers.這個問題的原因是我們使用的org.jetbrains.intellij版本較高,請使用2.x的版本。或者參照插件的源碼自己寫一個沒有accept的上傳方法即可。
相關代碼:
package idea;

import retrofit.RestAdapter;
import retrofit.client.Request;
import retrofit.client.Response;
import retrofit.client.UrlConnectionClient;
import retrofit.converter.SimpleXMLConverter;
import retrofit.mime.TypedFile;
import retrofit.mime.TypedString;

import java.io.File;
import java.io.IOException;
import java.net.HttpURLConnection;

/**
 * @author lijie
 * @date 2019/1/17
 */
public class PublishPluginTest {
    public static void main(String[] args) {
        PluginRepositoryService service = new RestAdapter.Builder().setEndpoint("https://插件倉庫鏈接").setClient(new UrlConnectionClient() {
            @Override
            protected HttpURLConnection openConnection(Request request) throws IOException {
                HttpURLConnection connection = super.openConnection(request);
                connection.setReadTimeout(10 * 60 * 1000);
                return connection;
            }
        }).setLogLevel(RestAdapter.LogLevel.BASIC)
            .setConverter(new SimpleXMLConverter())
            .build()
            .create(PluginRepositoryService.class);
        Response response = service.uploadByXmlId(new TypedString(""), new TypedString(""),
            new TypedString(pluginId), new TypedString("default"),
            new TypedFile("application/octet-stream",
                new File(plugin壓縮文件路徑)));
        System.out.println(response.getBody());
    }
}
package idea;
import retrofit.client.Response;
import retrofit.http.*;
import retrofit.mime.TypedFile;
import retrofit.mime.TypedString;
/**
* @author lijie
* @date 2019/1/17
*/
public interface PluginRepositoryService {
@Multipart
@POST("/plugin/uploadPlugin")
public Response uploadByXmlId(@Part("userName")TypedString username, @Part("password")TypedString password,
@Part("pluginId")TypedString pluginId, @Part("channel")TypedString channel,
@Part("file")TypedFile file);
}8 如何在插件中引入本地jar包
在build.gradle的dependencies裡邊添加如下內容:
compile fileTree(dir:'src/main/resources/lib',includes:['*jar'])然後,將本地jar包放到指定目錄即可。