本文來自於千鋒教育在阿里雲開發者社區學習中心上線課程《SpringBoot實戰教程》,主講人楊紅豔,點擊查看視頻內容。
SpringBoot整合Neo4j
添加依賴:
      <dependency>
          <groupId>org.springframework.boot</groupId>
          <artifactId>spring-boot-starter-data-neo4j</artifactId>
      </dependency>
在全局配置文件application.properties中添加:
spring.data.neo4j.uri=http://localhost:7474
spring.data.neo4j.username=neo4j
spring.data.neo4j.password=123
UserNode:
//表示節點類型
@NodeEntity(label="User")
public class UserNode {

    @GraphId
    private Long nodeId;

    @Property
    private String userId;

    @Property
    private String name;

    @Property
    private int age;

//get,set方法省略
}
UserRelation:
//表示關係類型
@RelationshipEntity(type="UserRelation")
public class UserRelation {

    @GraphId
    private Long id;

    @StartNode
    private UserNode startNode;

    @EndNode
    private UserNode endNode;


//get,set方法省略
}
dao:
UserRepository:
@Component
public interface UserRepository extends GraphRepository<UserNode> {

    @Query("MATCH (n:User) RETURN n ")
    List<UserNode> getUserNodeList();

    @Query("create (n:User{age:{age},name:{name}}) RETURN n ")
    List<UserNode> addUserNodeList(@Param("name") String name, @Param("age")int age);
}
UserRelationRepository:
@Component
public interface UserRelationRepository extends GraphRepository<UserRelation> {

    @Query("match p=(n:User)<-[r:UserRelation]->(n1:User) where n.userId={firstUserId} and n1.userId={secondUserId} return p")
    List<UserRelation> findUserRelationByEachId(@Param("firstUserId") String firstUserId, @Param("secondUserId") String secondUserId);

    @Query("match (fu:User),(su:User) where fu.userId={firstUserId} and su.userId={secondUserId} create p=(fu)-[r:UserRelation]->(su) return p")
    List<UserRelation> addUserRelation(@Param("firstUserId") String firstUserId, @Param("secondUserId") String secondUserId);

}
UserService:
@Service
public class UserService {

    @Autowired
    private UserRepositoty userRepositoty;

    public void addUserNode(UserNode userNode) {

        userRepository.addUserNodeList(userNode.getName(), userNode.getAge());
    }
}
Neo4jController:
@Controller
public class Neo4jController {

    @@Autowired
    private UserService userService;

    @RequestMapping("/saveUser")
    @ResponseBody
    public String saveUserNode() {

        UserNode node = new UserNode();
        node.setNodeId(1l);
        node.setUserId("666");
        node.setName("張三");
        node.setAge(25);

        UserService.addUserNode(node);
        return "success";
    }

}
在啟動類中添加所有需要掃描的包:
@SpringBootApplication(scanBasePackages="com.qianfeng")
@EnableNeo4jRepositories(basePackages="com.qianfeng.dao")
@EntityScan(basePackages="com.qianfeng.pojo")
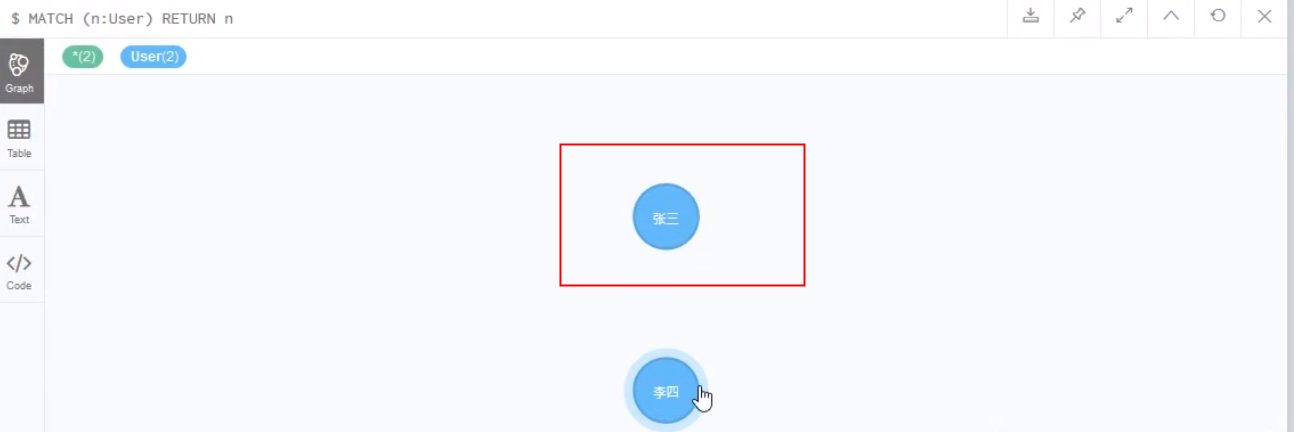
執行結果:


打包發佈
1、需要打成war包
2、添加依賴:
      <dependency>
            <groupId>org.springframework.boot</groupId>
            <artifactId>spring-boot-starter-tomcat</artifactId>
            <scope>provided</scope>
      </dependency>
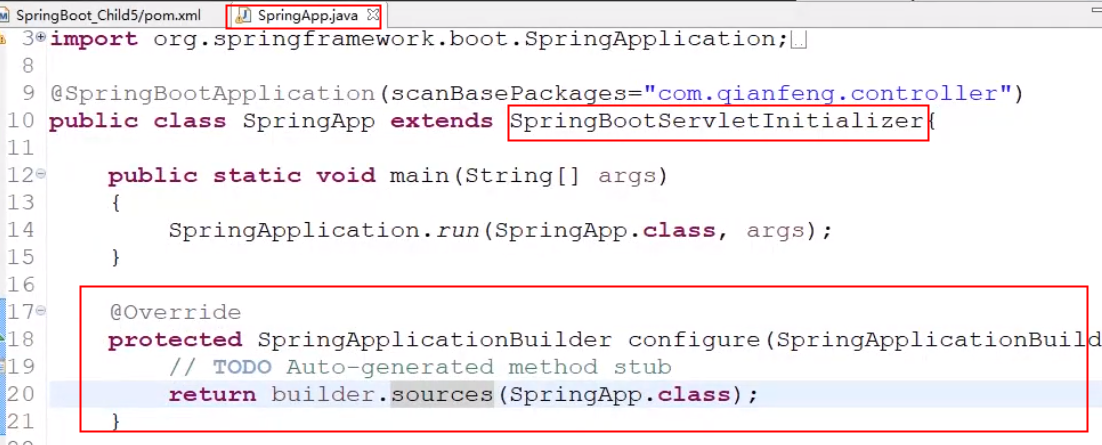
3、啟動類繼承SpringBootServletInitializer,重寫configure方法
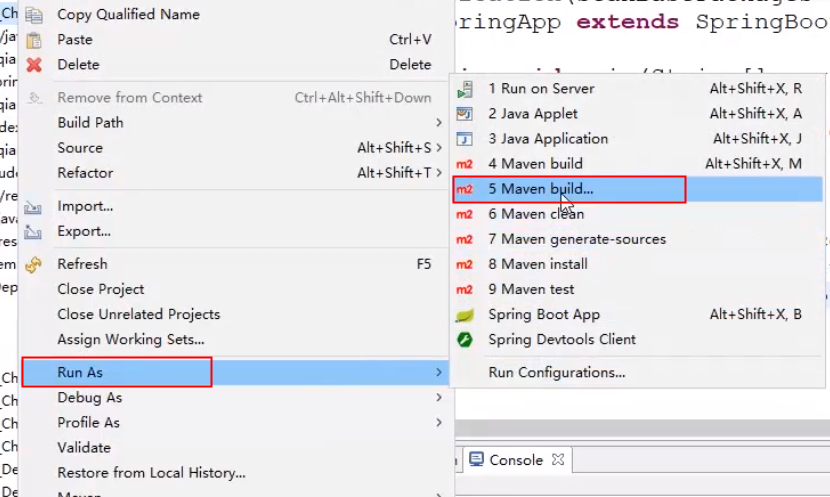
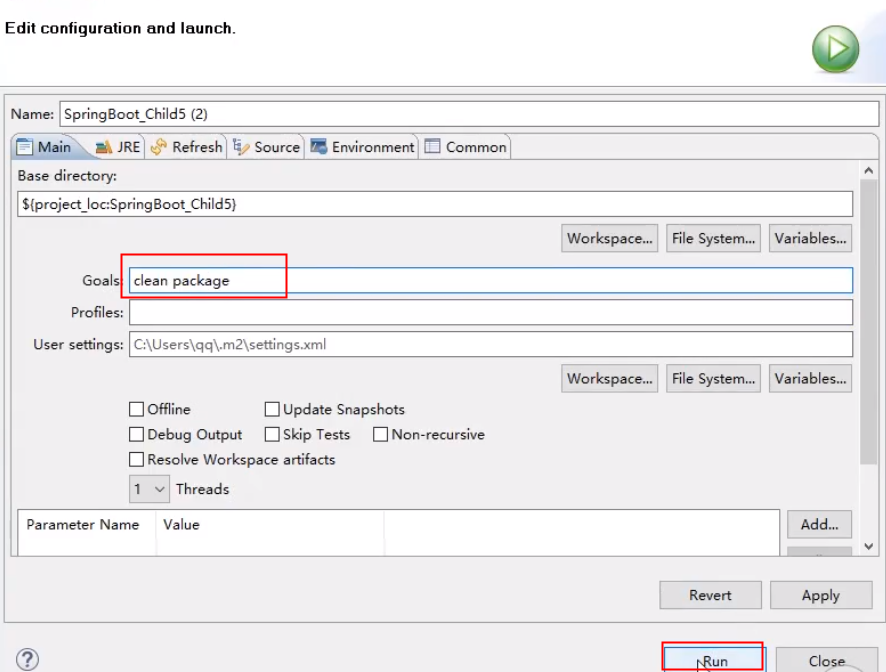
需要打包的工程如圖所示:

war包地址:
然後就可以部署到自己的服務器了。