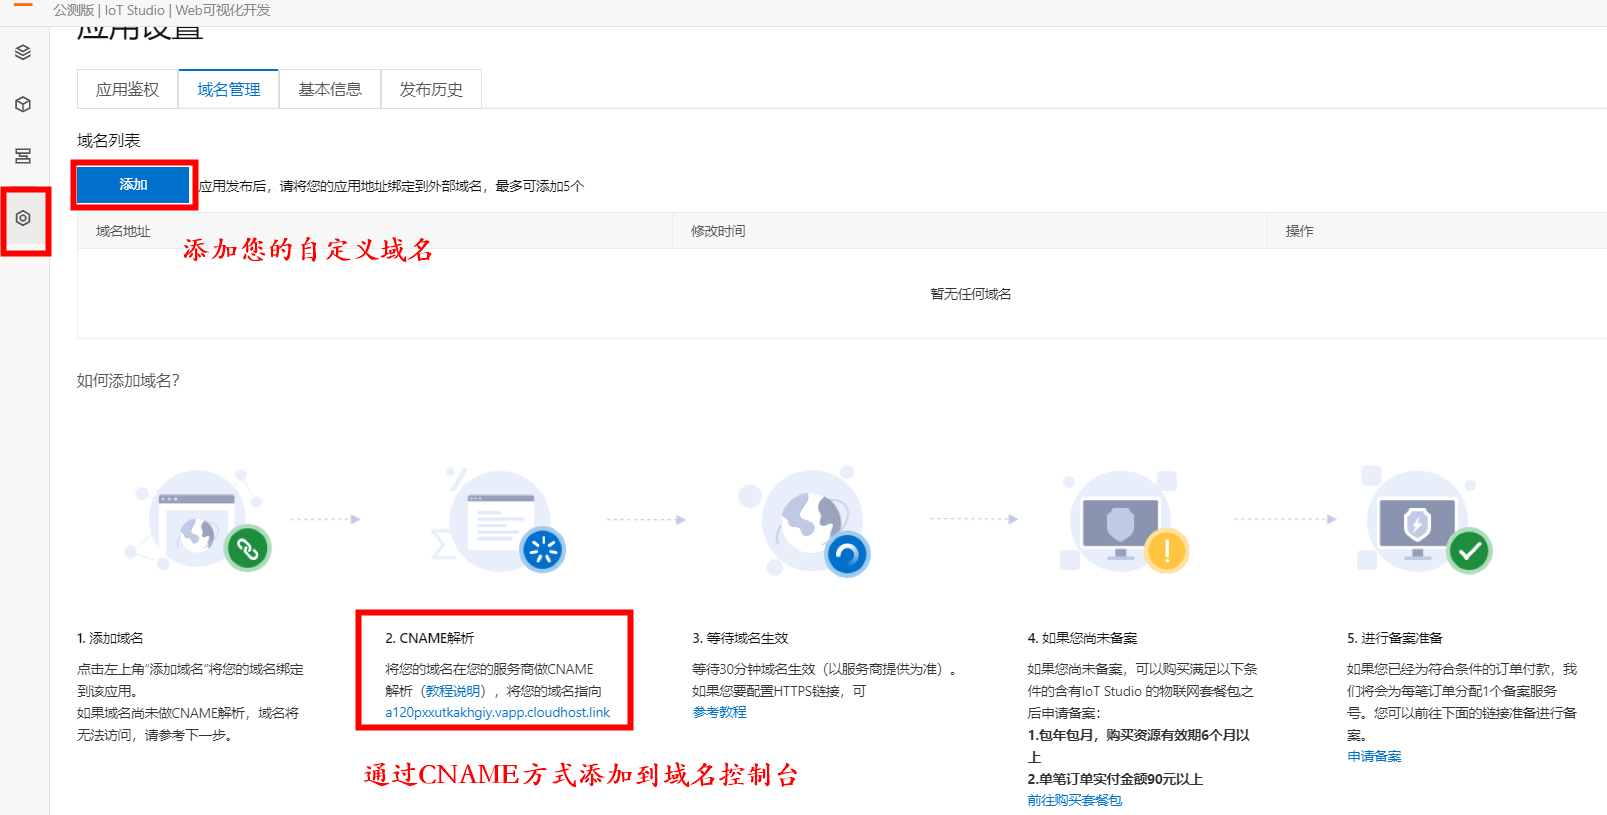
創建產品和設備
1、創建產品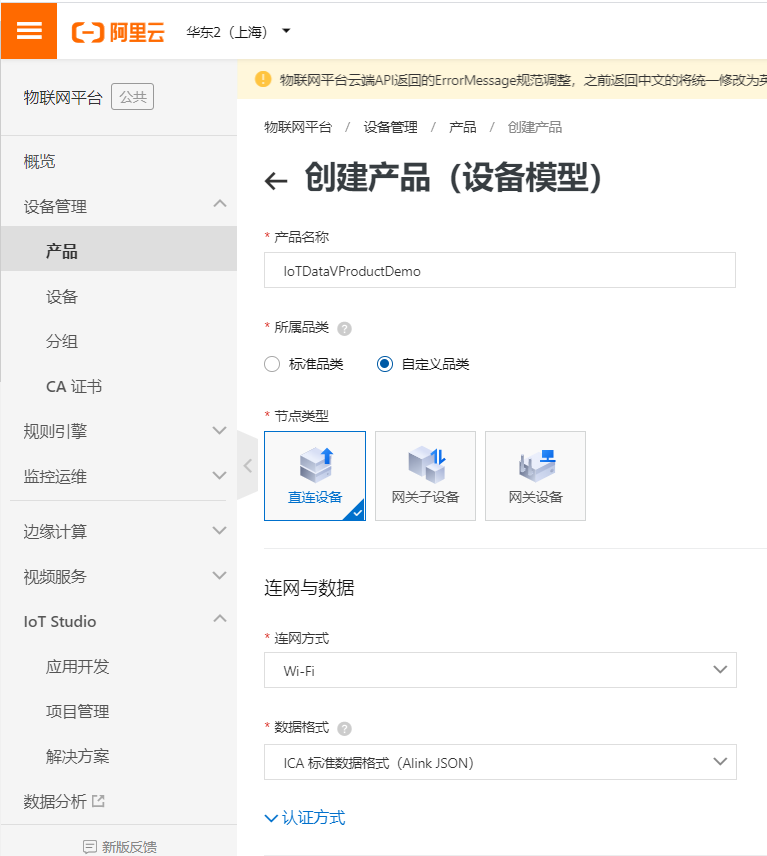
2、編輯產品功能,添加溫度屬性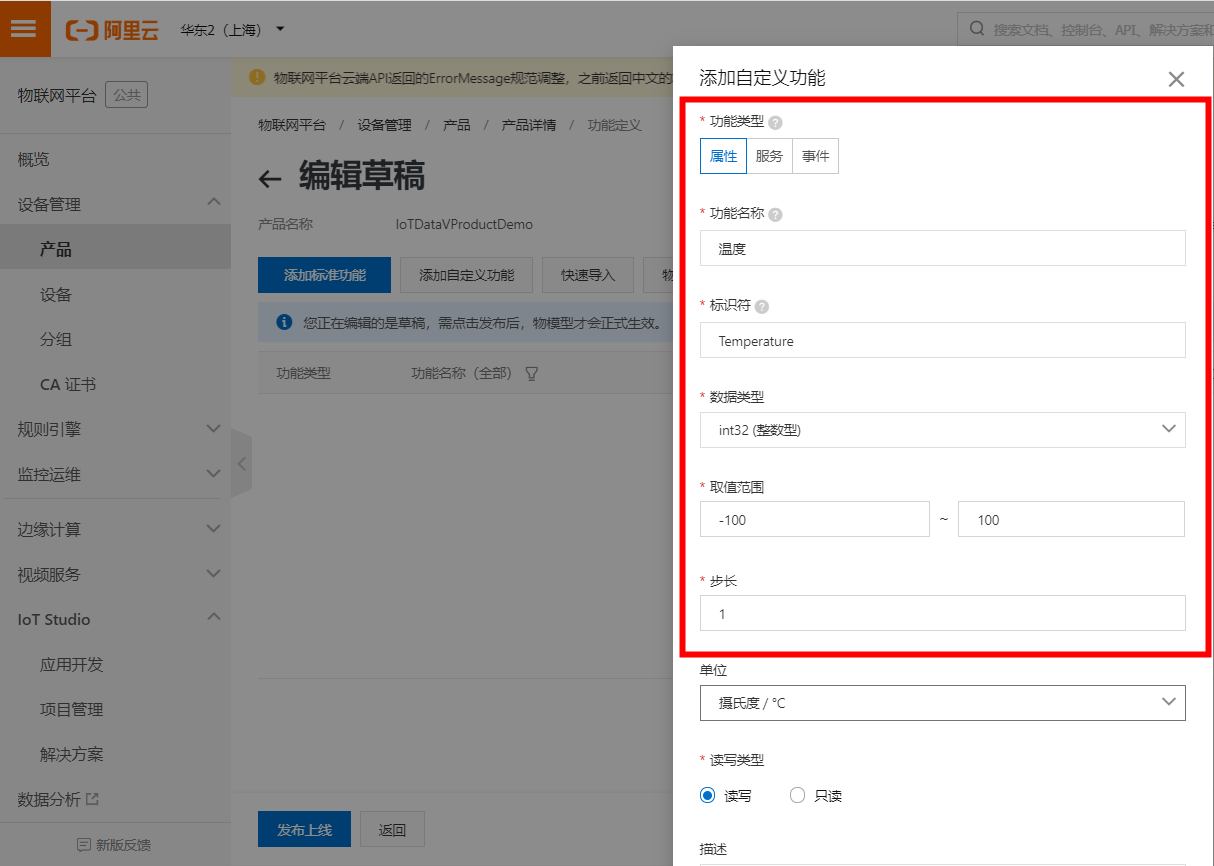
3、添加設備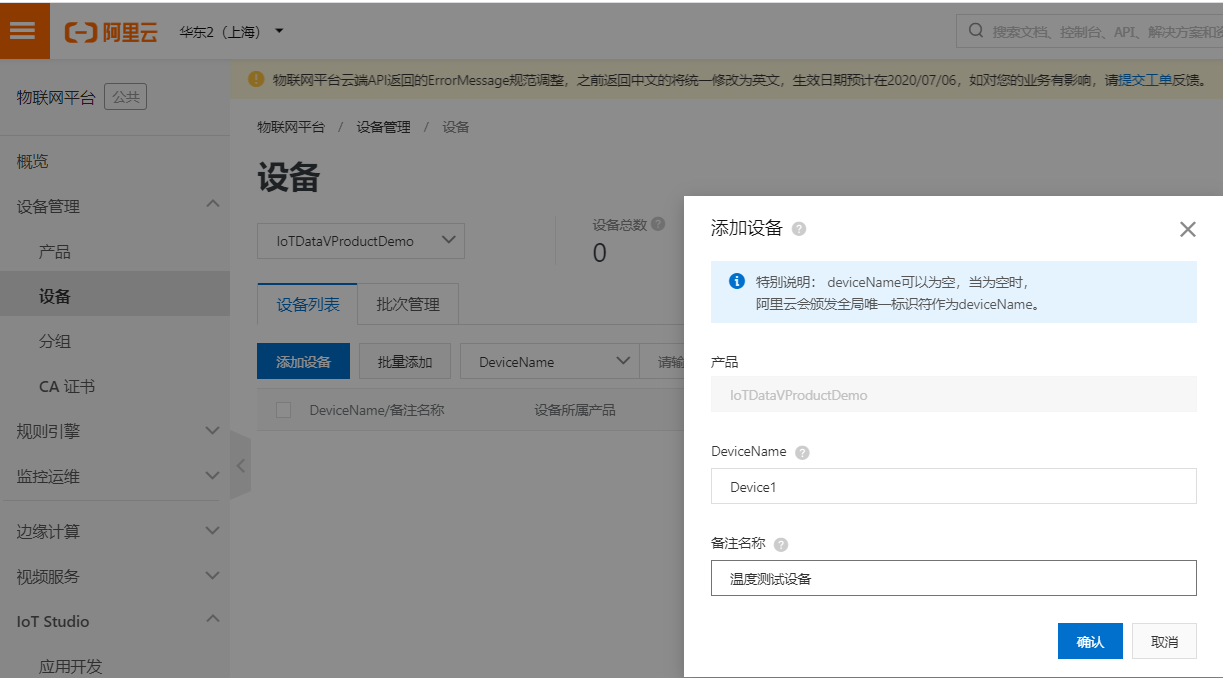

設備上報屬性
import com.alibaba.taro.AliyunIoTSignUtil;
import com.google.common.util.concurrent.ThreadFactoryBuilder;
import org.eclipse.paho.client.mqttv3.*;
import org.eclipse.paho.client.mqttv3.persist.MemoryPersistence;
import java.util.HashMap;
import java.util.Map;
import java.util.Random;
import java.util.concurrent.ScheduledExecutorService;
import java.util.concurrent.ScheduledThreadPoolExecutor;
import java.util.concurrent.TimeUnit;

public class IoTDemoPubSubDemoForQuickStartProduct {
    // 設備三元組信息
    public static String productKey = "a1L********";
    public static String deviceName = "Device1";
    public static String deviceSecret = "c96a082fcfa6e817********";
    public static String regionId = "cn-shanghai";

    // 物模型-屬性上報topic
    private static String pubTopic = "/sys/" + productKey + "/" + deviceName + "/thing/event/property/post";
    // 自定義topic,在產品Topic列表位置定義
    private static String subTopic = "/sys/" + productKey + "/" + deviceName + "/thing/event/property/post_reply";

    private static MqttClient mqttClient;

    public static void main(String [] args){

        initAliyunIoTClient();
        ScheduledExecutorService scheduledThreadPool = new ScheduledThreadPoolExecutor(1,
                new ThreadFactoryBuilder().setNameFormat("thread-runner-%d").build());

        scheduledThreadPool.scheduleAtFixedRate(()->postDeviceProperties(), 2,2, TimeUnit.SECONDS);

        try {
            mqttClient.subscribe(subTopic); // 訂閱Topic
        } catch (MqttException e) {
            System.out.println("error:" + e.getMessage());
            e.printStackTrace();
        }

        // 設置訂閱監聽
        mqttClient.setCallback(new MqttCallback() {
            @Override
            public void connectionLost(Throwable throwable) {
                System.out.println("connection Lost");
            }

            @Override
            public void messageArrived(String s, MqttMessage mqttMessage) throws Exception {
                System.out.println("Sub message");
                System.out.println("Topic : " + s);
                System.out.println(new String(mqttMessage.getPayload())); //打印輸出消息payLoad
            }

            @Override
            public void deliveryComplete(IMqttDeliveryToken iMqttDeliveryToken) {
            }
        });

    }

    /**
     * 初始化 Client 對象
     */
    private static void initAliyunIoTClient() {

        try {
            // 構造連接需要的參數
            String clientId = "java" + System.currentTimeMillis();
            Map<String, String> params = new HashMap<>(16);
            params.put("productKey", productKey);
            params.put("deviceName", deviceName);
            params.put("clientId", clientId);
            String timestamp = String.valueOf(System.currentTimeMillis());
            params.put("timestamp", timestamp);
            // cn-shanghai
            String targetServer = "tcp://" + productKey + ".iot-as-mqtt."+regionId+".aliyuncs.com:1883";

            String mqttclientId = clientId + "|securemode=3,signmethod=hmacsha1,timestamp=" + timestamp + "|";
            String mqttUsername = deviceName + "&" + productKey;
            String mqttPassword = AliyunIoTSignUtil.sign(params, deviceSecret, "hmacsha1");

            connectMqtt(targetServer, mqttclientId, mqttUsername, mqttPassword);

        } catch (Exception e) {
            System.out.println("initAliyunIoTClient error " + e.getMessage());
        }
    }

    public static void connectMqtt(String url, String clientId, String mqttUsername, String mqttPassword) throws Exception {

        MemoryPersistence persistence = new MemoryPersistence();
        mqttClient = new MqttClient(url, clientId, persistence);
        MqttConnectOptions connOpts = new MqttConnectOptions();
        // MQTT 3.1.1
        connOpts.setMqttVersion(4);
        connOpts.setAutomaticReconnect(false);
        connOpts.setConnectionTimeout(10);
//        connOpts.setCleanSession(true);
        connOpts.setCleanSession(false);

        connOpts.setUserName(mqttUsername);
        connOpts.setPassword(mqttPassword.toCharArray());
        connOpts.setKeepAliveInterval(60);

        mqttClient.connect(connOpts);
    }

    /**
     * 彙報屬性
     */
    private static void postDeviceProperties() {

        try {
            //上報數據
            //高級版 物模型-屬性上報payload
            System.out.println("上報屬性值");
//            String payloadJson = "{\"params\":{\"Temperature\":12}}";

            String payloadJson = "{\"params\":{\"Temperature\":"+RandomNextIntDemo2()+"}}";
            MqttMessage message = new MqttMessage(payloadJson.getBytes("utf-8"));
            message.setQos(1);
            mqttClient.publish(pubTopic, message);
        } catch (Exception e) {
            System.out.println(e.getMessage());
        }
    }

    /**
     * 生成[0,100)區間的整數
     */
    public static Integer RandomNextIntDemo2(){
        Random r = new Random();
        int n2 = r.nextInt(100);
        System.out.println("n2:"+n2);
        return n2;
    }
}
參考:
數據分析開發API接口
1、配置數據源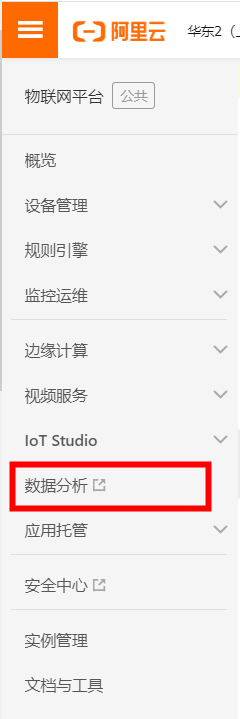
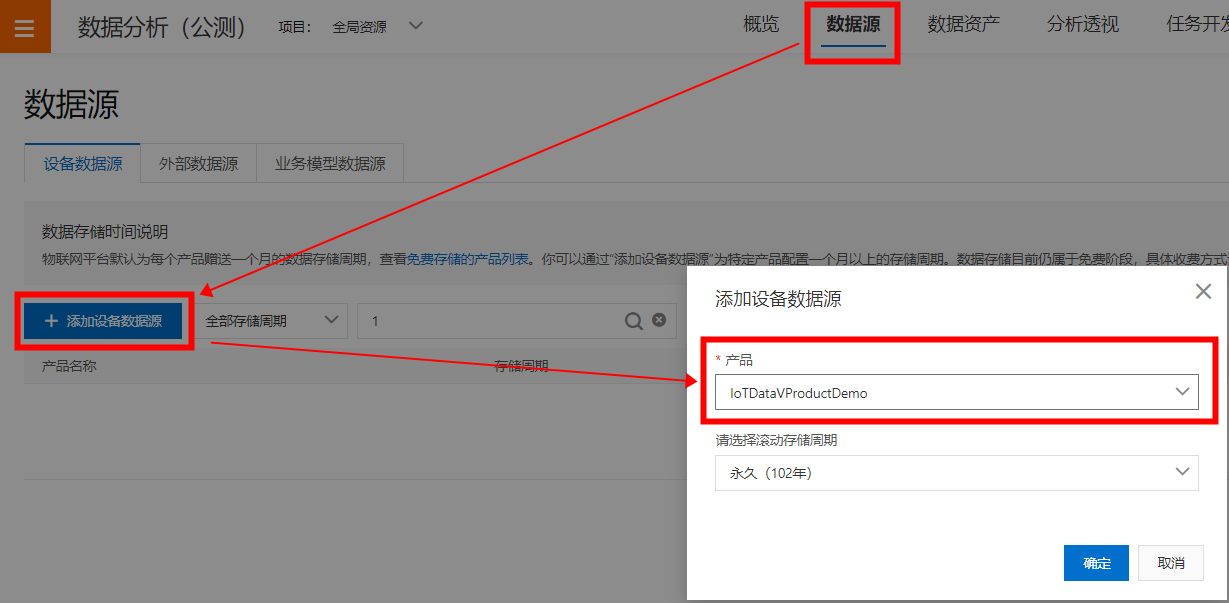
2、創建SQL分析
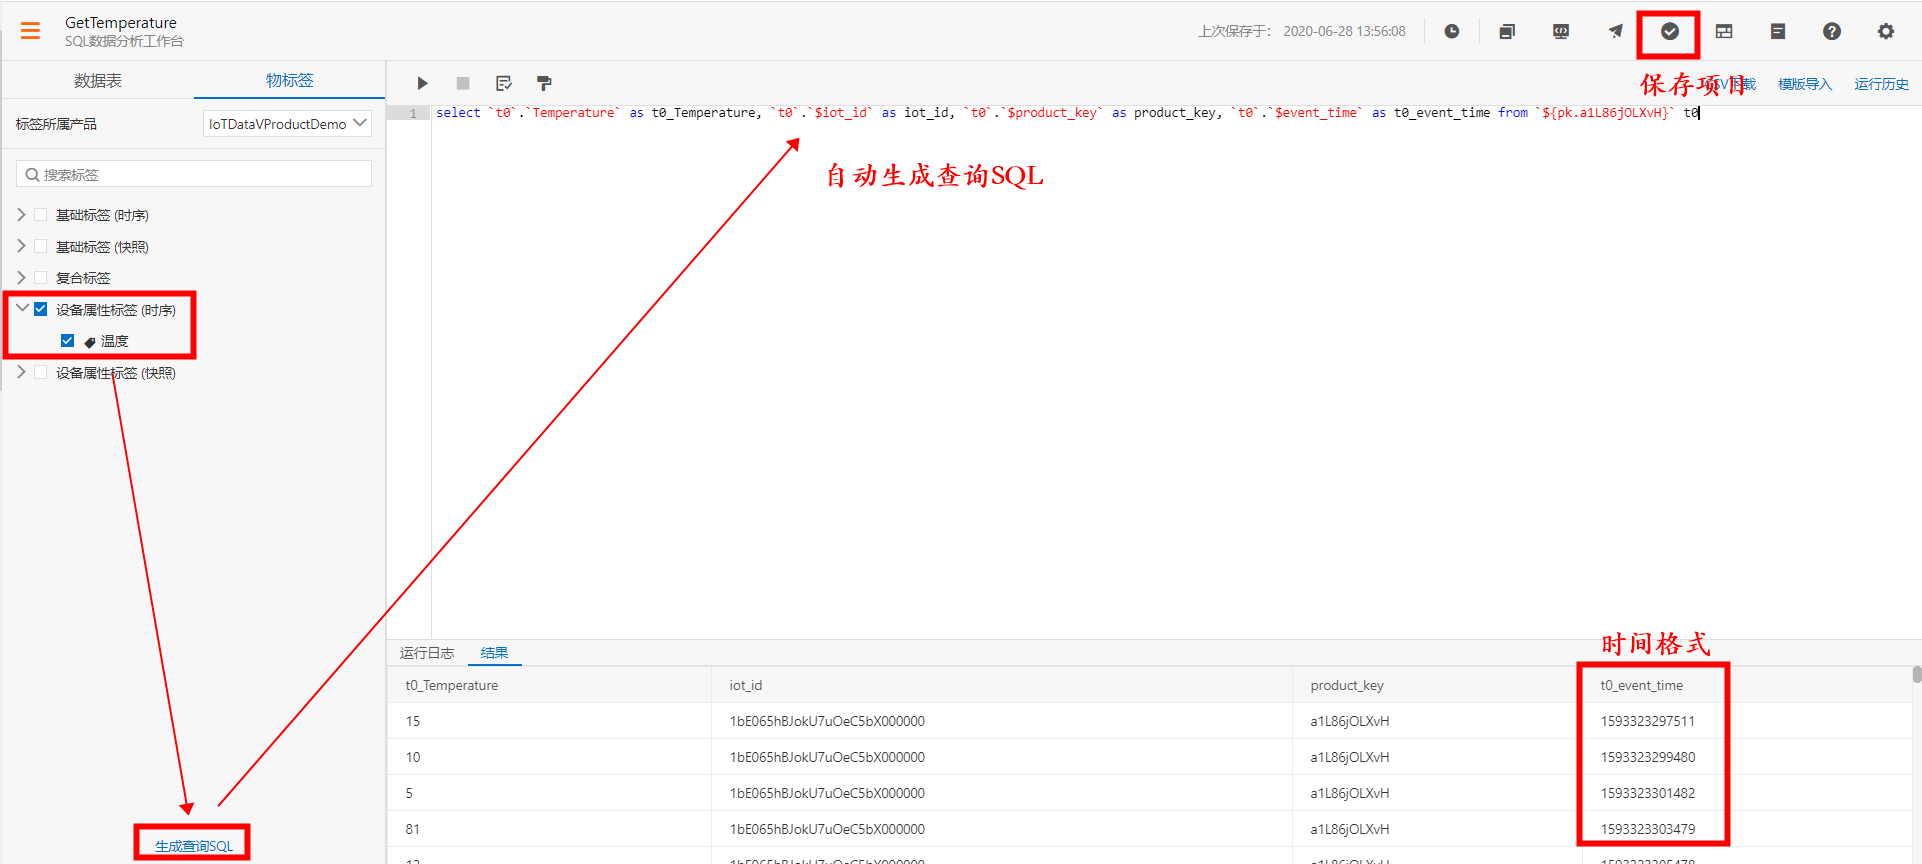
調整SQL語句,規範化時間顯示格式及排序
select `t0`.`Temperature` as t0_Temperature, `t0`.`$iot_id` as iot_id, `t0`.`$product_key` as product_key, from_unixtime(`t0`.`$event_time`/1000, '%Y-%m-%d %H:%i:%S') as t0_event_time from `${pk.替換為您自己的產品ProductKey}` t0 order by 't0'.'$event_time' desc3、生成API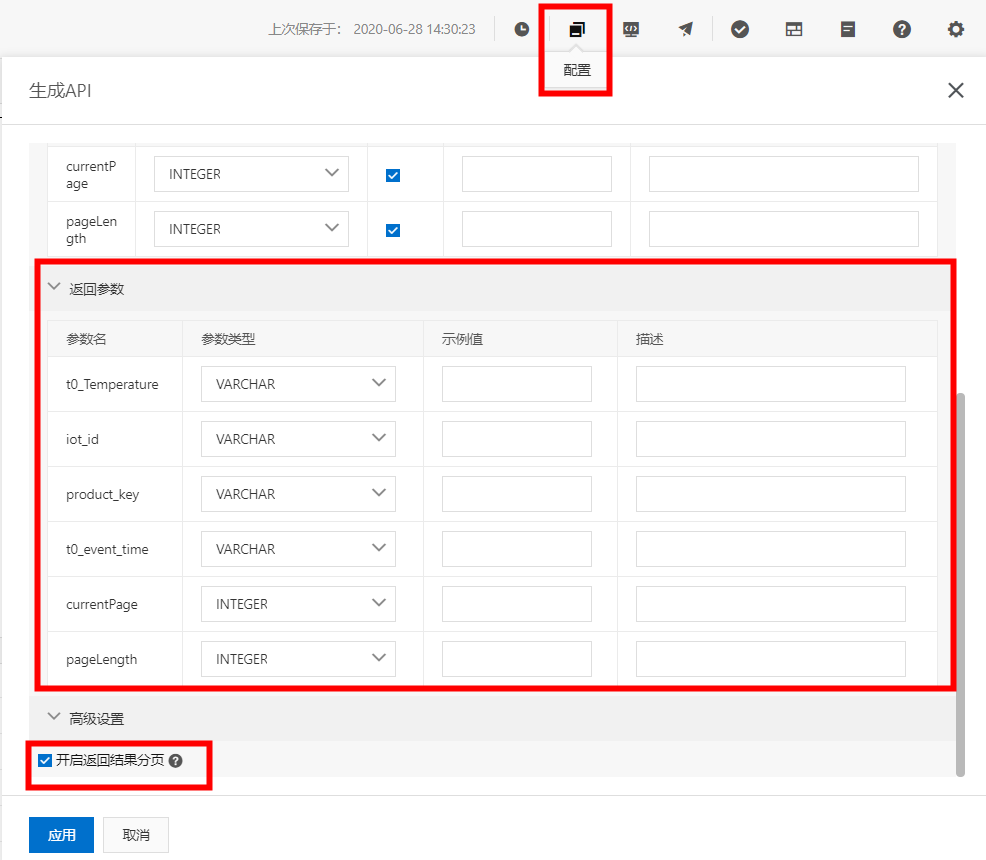
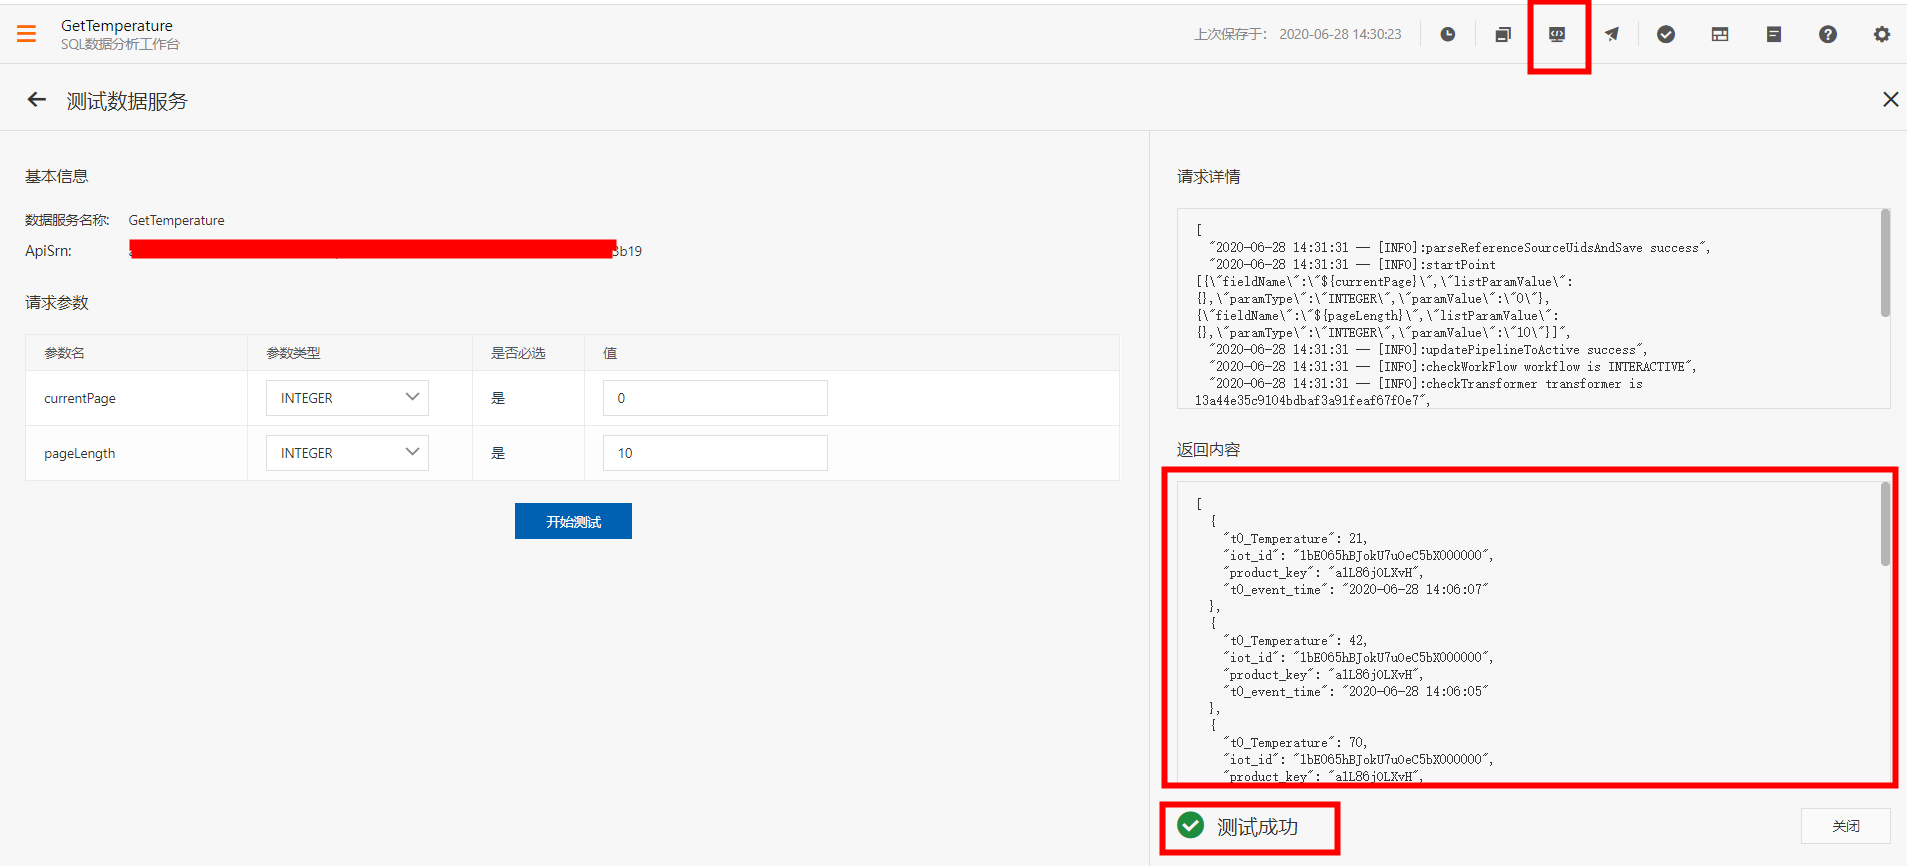

DataV組件配置
1、創建Web可視化項目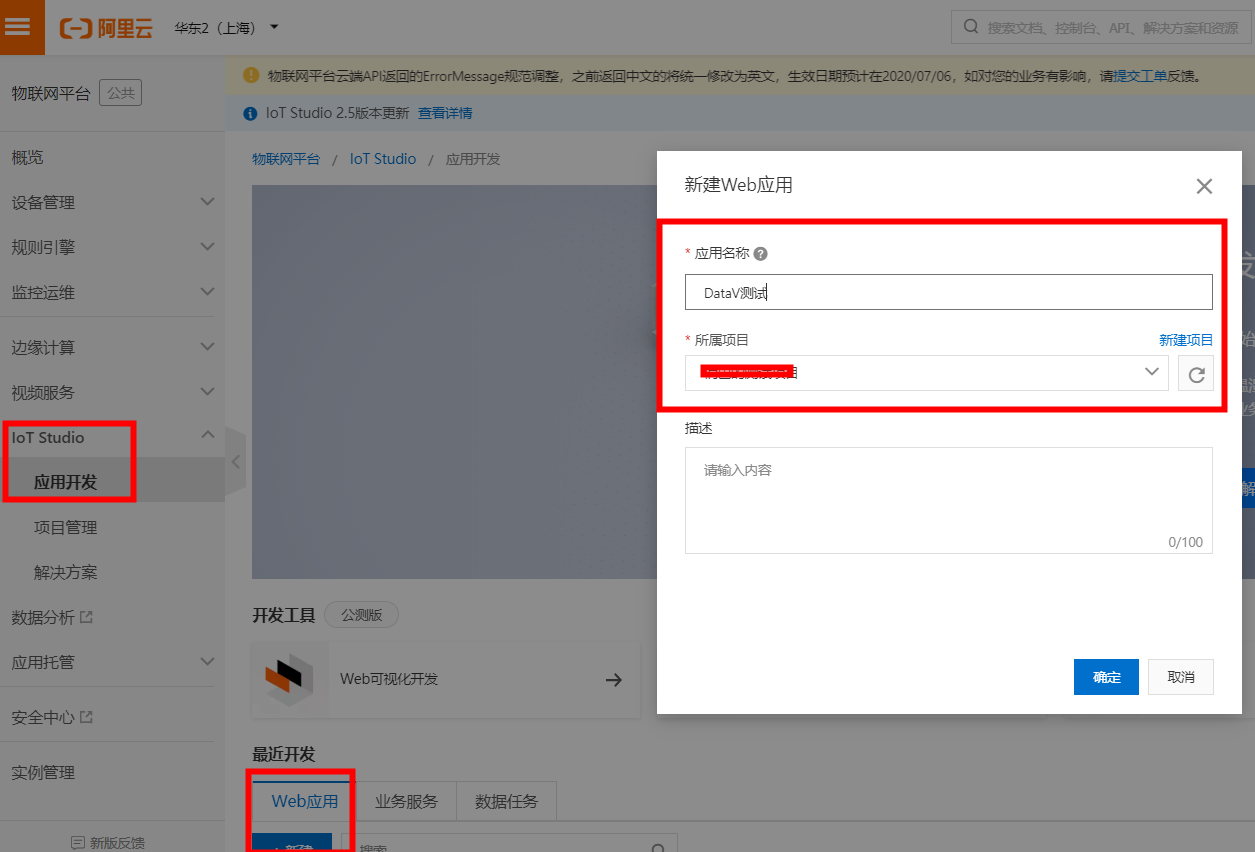
2、添加DataV組件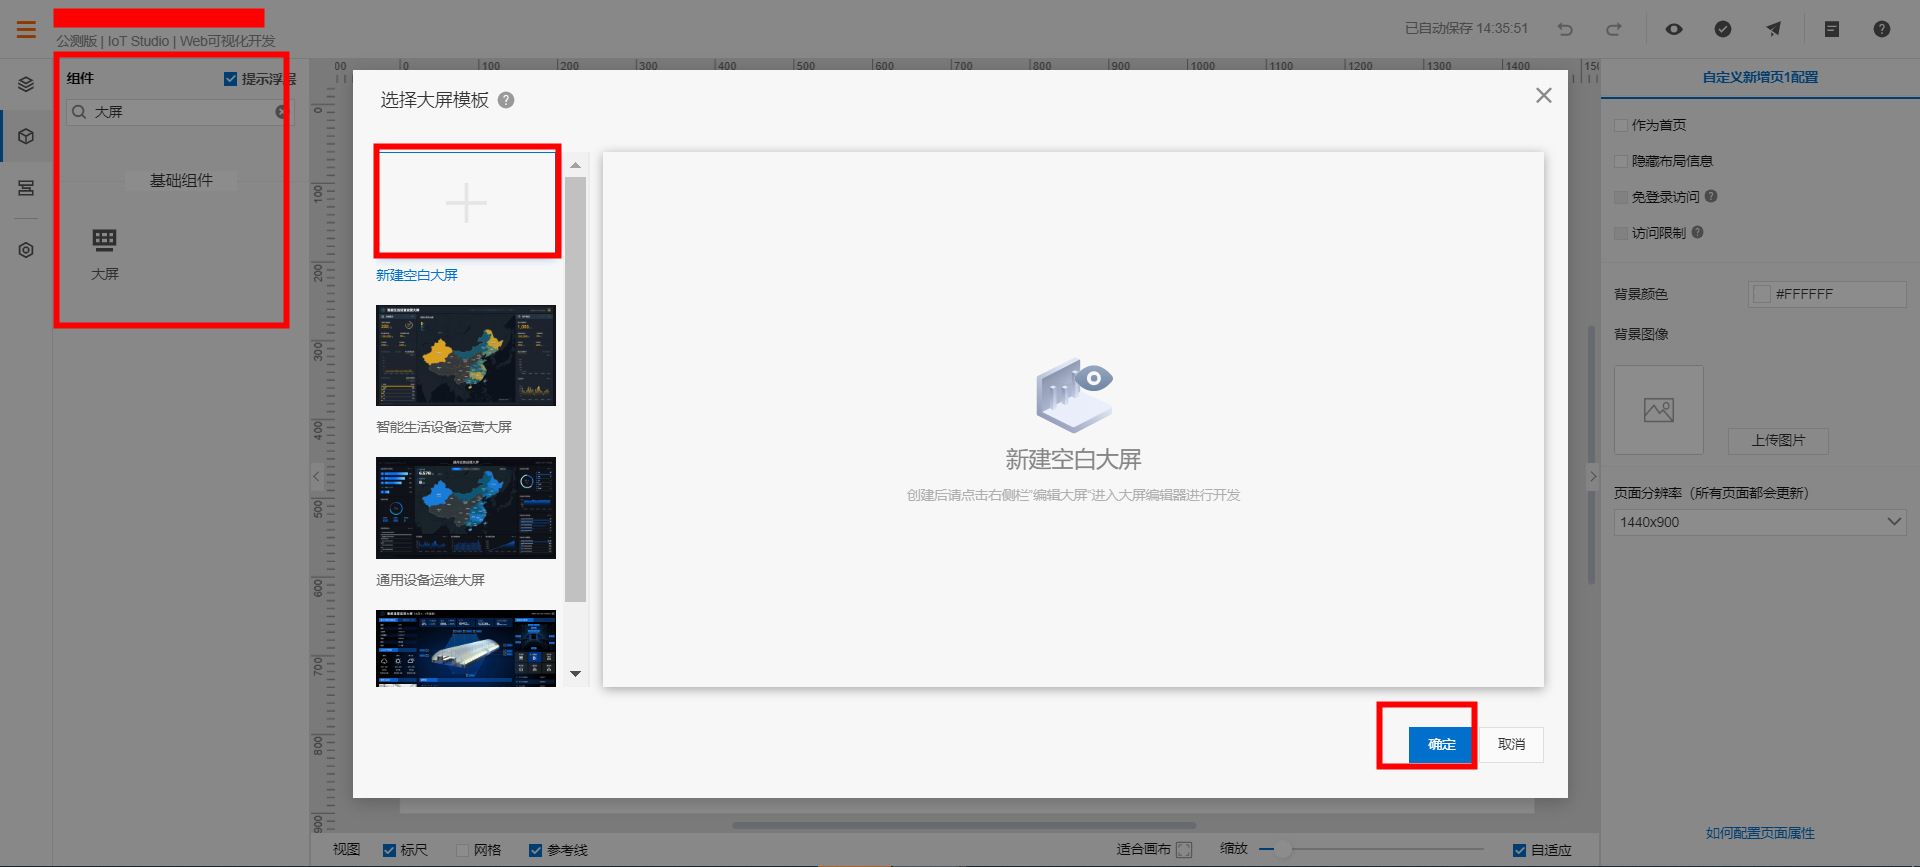
3、編輯大屏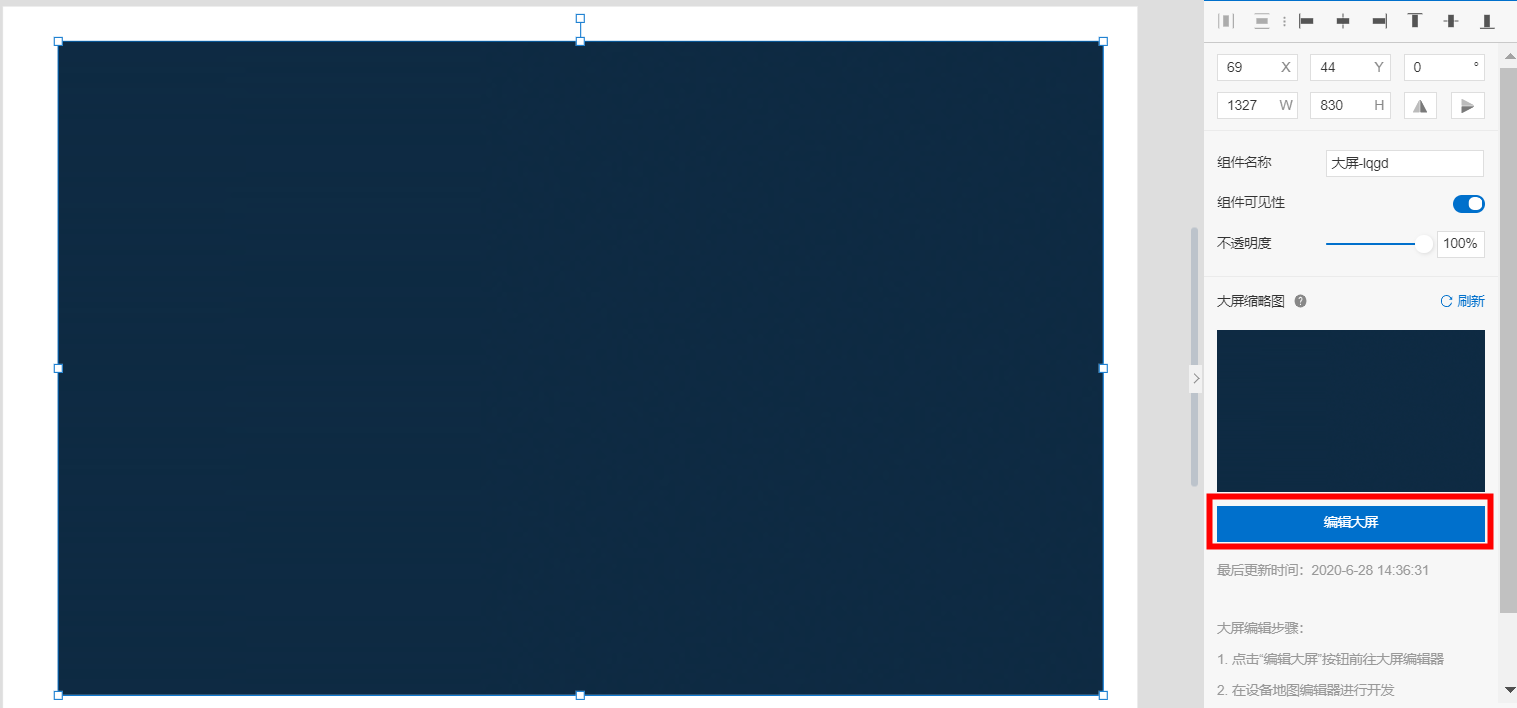

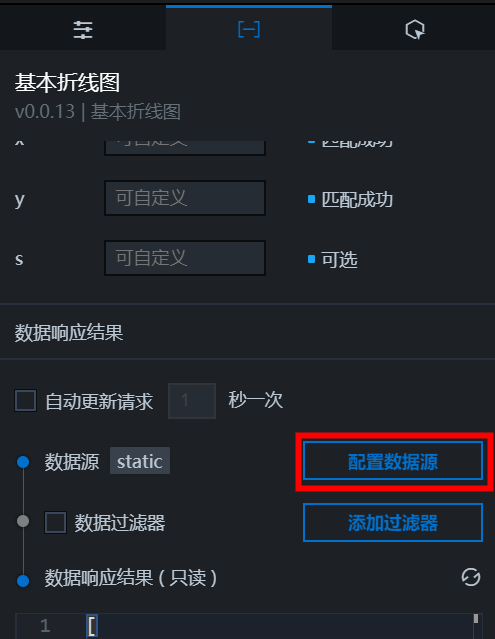
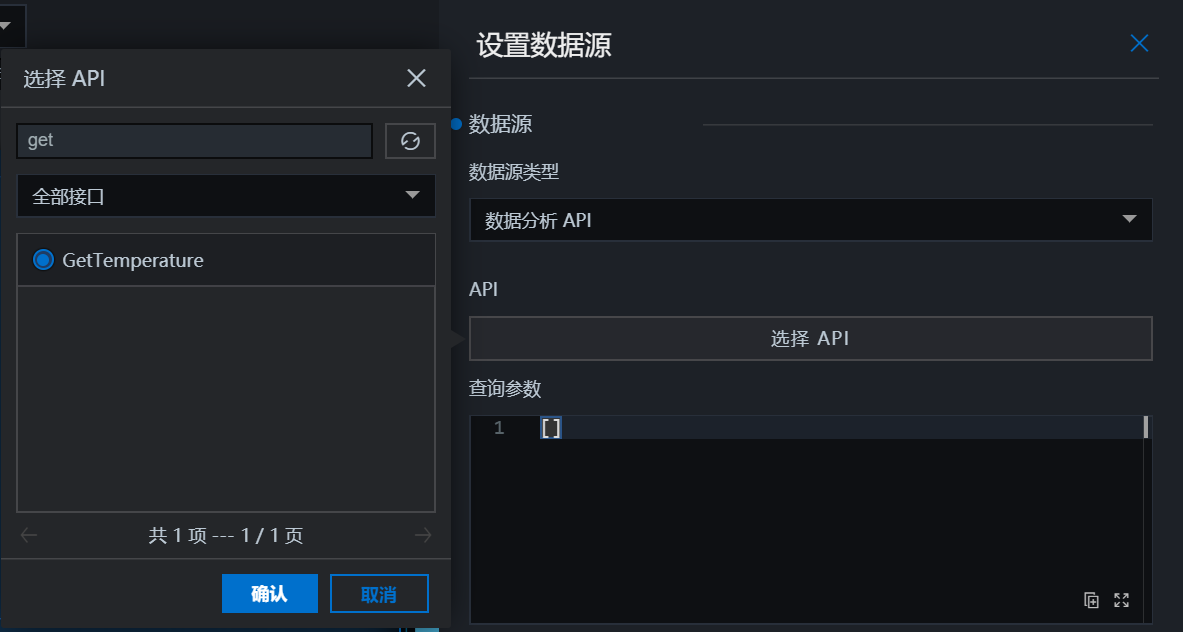
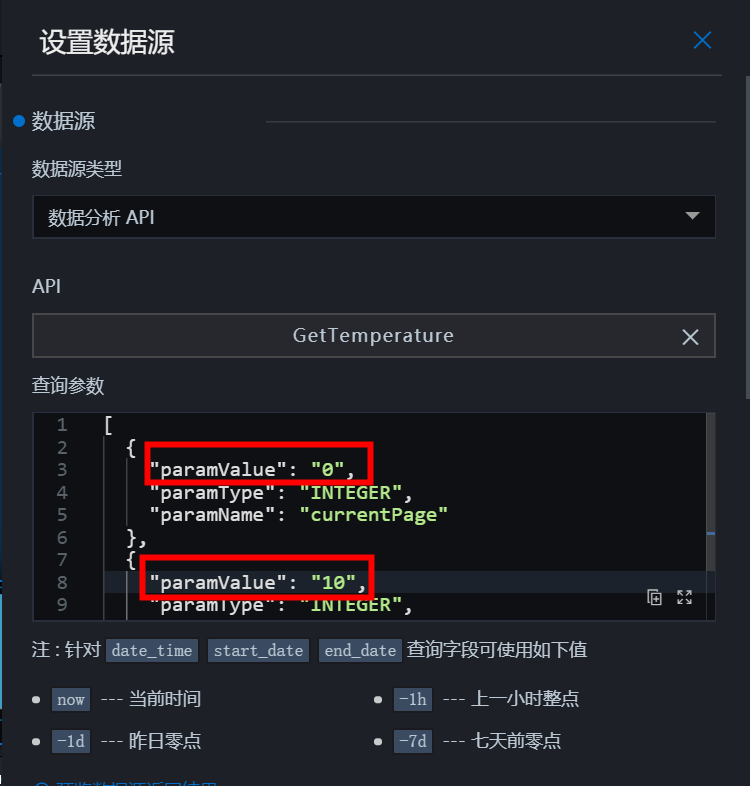
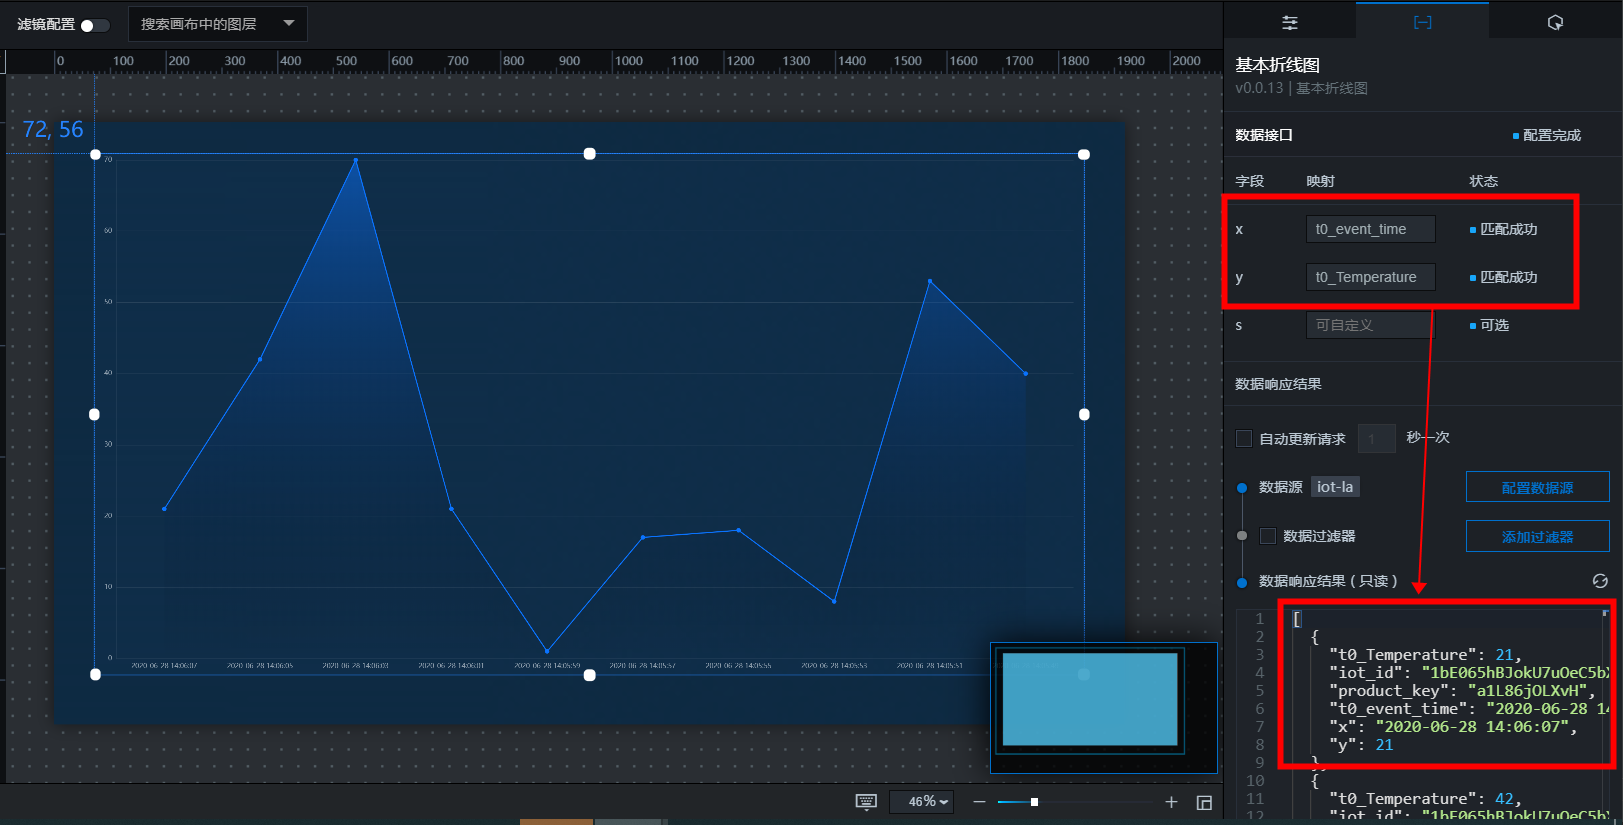
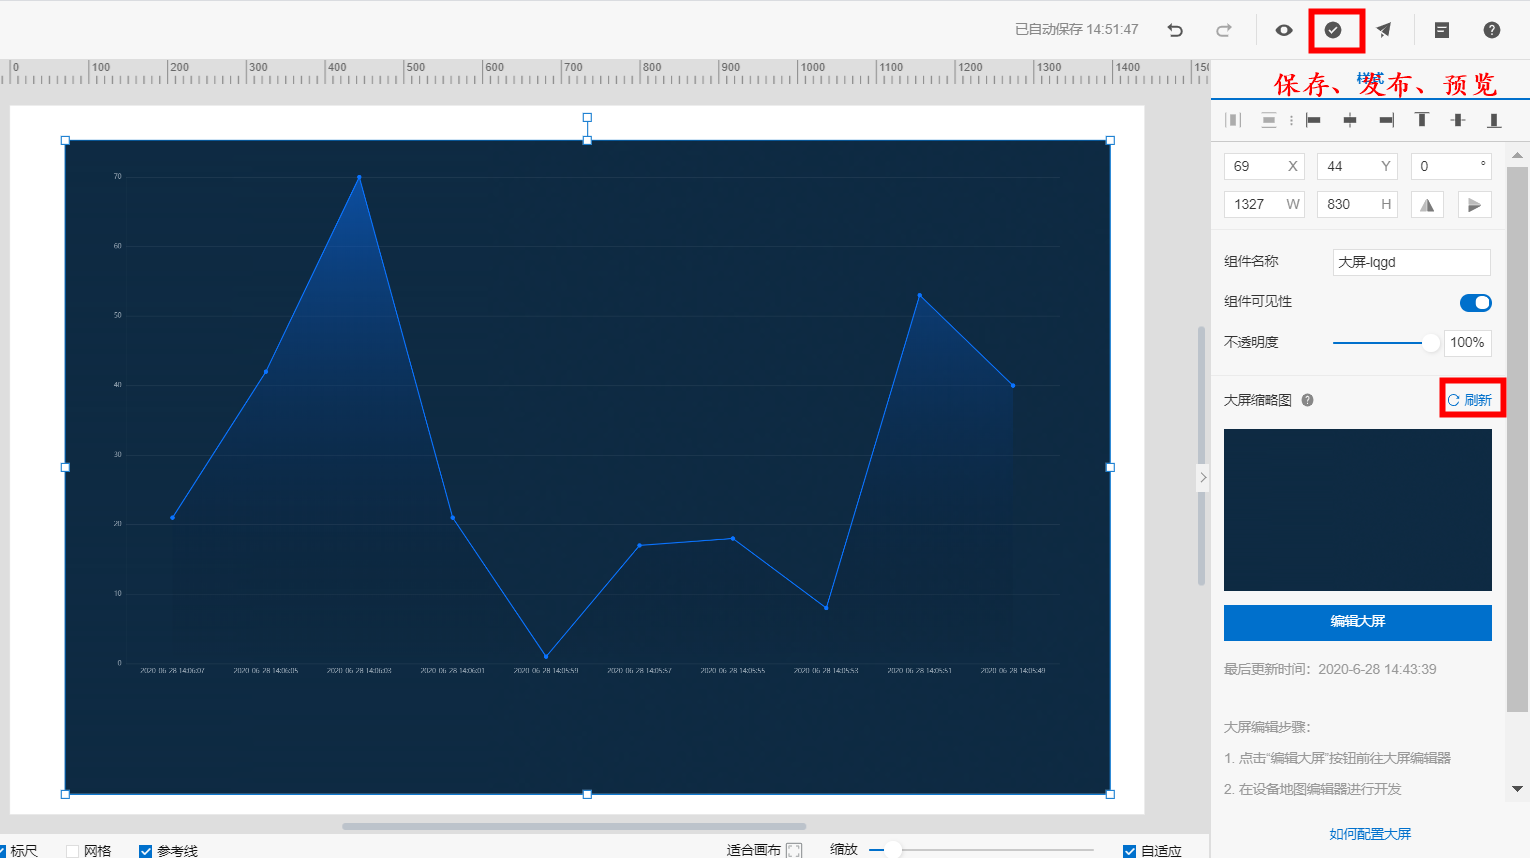
4、發佈後預覽效果

5、域名綁定